Figma to Web App: How to Turn Your Design Into a Real Product
November 22, 2024•7 min read

I hope you enjoy reading this post. If you want us to do your frontend development or design, click here.
Author: Alex Vasylenko | Founder of The Frontend Company
Converting Figma design into a working web application is the final step in your goal of making your product vision a desirable reality. To turn these static designs into responsive web apps, you need a team of skilled developers who know how to bring every element to life. This process is more than just transforming pixels into code — it requires planning, careful execution, and a focus on performance and scalability.
In this article, I will walk you through every step of collaboration between the business and the web development team during Figma to web app conversion. We will go from point A — where you have your design in Figma — to point B — where your vision becomes a fully working web app.
Stage 1: Design Analysis

The first step in converting Figma to a web application is design analysis and preparation. Here, the development team deeply explores every design element to understand the required resources and estimate time for implementation.
In real-life scenarios, developers review the design and provide feedback on the technical feasibility of specific features. Sometimes, a design includes elements that are difficult to implement within a budget or timeline.
For example, intricate animations or highly custom UI components might require extra development time and resources. A single developer might need 1-2 weeks to implement and refine these features.
How to prepare?
First, make sure your design is polished and organized. Consistent components, clear naming, and detailed interaction notes will simplify the process and save everyone time. Be prepared to discuss your priorities: if your design has resource-intensive features, developers will need to know which ones are critical and which could be simplified if needed.
Additionally, clearly understanding your project's timeline and budget will help the team provide realistic estimates.
This stage is about collaboration and setting expectations. By aligning the design vision with technical realities, you will have an ambitious and achievable plan and set your Figma to web app conversion for success.
Stage 2: Choosing the Right Technology

After the design analysis, the next step is to choose the right technology for your project. This decision is very important as it will impact your web app's performance, scalability, and future maintainability. During this stage, the development team will closely communicate with your business to understand your app's requirements and recommend the most suitable frameworks, libraries, and tools.
For example, you might choose React or Angular if your project requires a highly interactive UI. React is a powerful JavaScript library known for its flexibility and high performance when building dynamic user interfaces. Angular is a comprehensive framework with a robust structure, making it ideal for large-scale enterprise applications. To learn more about migration on these technologies, check out our last articles: Figma to React and Figma to Angular.
Here are things to consider when choosing a technology for your project:
Scalability: Will the technology support your app as it grows and handles more users?
Development Speed: Does the technology allow for rapid prototyping and fast development?
Community Support and Documentation: Is the technology well-documented and widely used so you can find solutions and support?
Long-term Viability: Is the technology actively maintained and backed by a strong community or a reputable organization?
How to Prepare?
Be prepared to discuss your app's future plans, such as user growth, feature expansions, or integrations with other platforms. Understanding your business's goals will help the development team choose a technology that aligns with your current and future vision.

Transform your UI for peak performance!
🔹
Unlock seamless, high-performance frontend solutions tailored to your business.
🔹
Get an interface that outshines competitors and delights your users.
Stage 3: Setting Up the Project Architecture

After you've chosen the suitable technology, it's time to lay down the technical foundation of your web app.
Setting up the project architecture is like building the structural foundation of a house: it determines how stable, scalable, and maintainable your app will be in the long run. This stage includes carefully planning, defining folder structures, and configuring necessary tools and services.
Key Considerations During This Stage:
Scalability: The architecture should support future growth without requiring major overhauls.
Maintainability: A clean codebase makes it easier for developers to add features or fix issues later on.
Security Measures: Developers also set up basic security measures, such as authentication and authorization to protect user data.
How to Prepare?
Share any specific constraints, such as data privacy regulations, the number of expected users, or integrations with existing systems.
During this phase, be open to suggestions from the development team — they might propose architectural decisions that will improve scalability or simplify future updates. Your active participation and detailed input will help to design an architecture that aligns with your goals and sets the project up for success.
Stage 4: Coding

After meeting with the development team and building a collaboration plan, it's time to start coding and turn your design from Figma to web app.
During this stage, the developers will take the lead, and you need to trust them. This is the time when your collaboration pays off, and while you wait for features to be released, you will get reports on what's been done and what's next. These updates will keep you in the loop and allow you to provide feedback as soon as possible.
Now that the foundation is set and communication is flowing, the actual development work begins.
Developers meticulously build each component, implement user interactions, and integrate the app's business logic and data handling. Let's break down what this process looks like and how each step is managed to bring your vision to life.
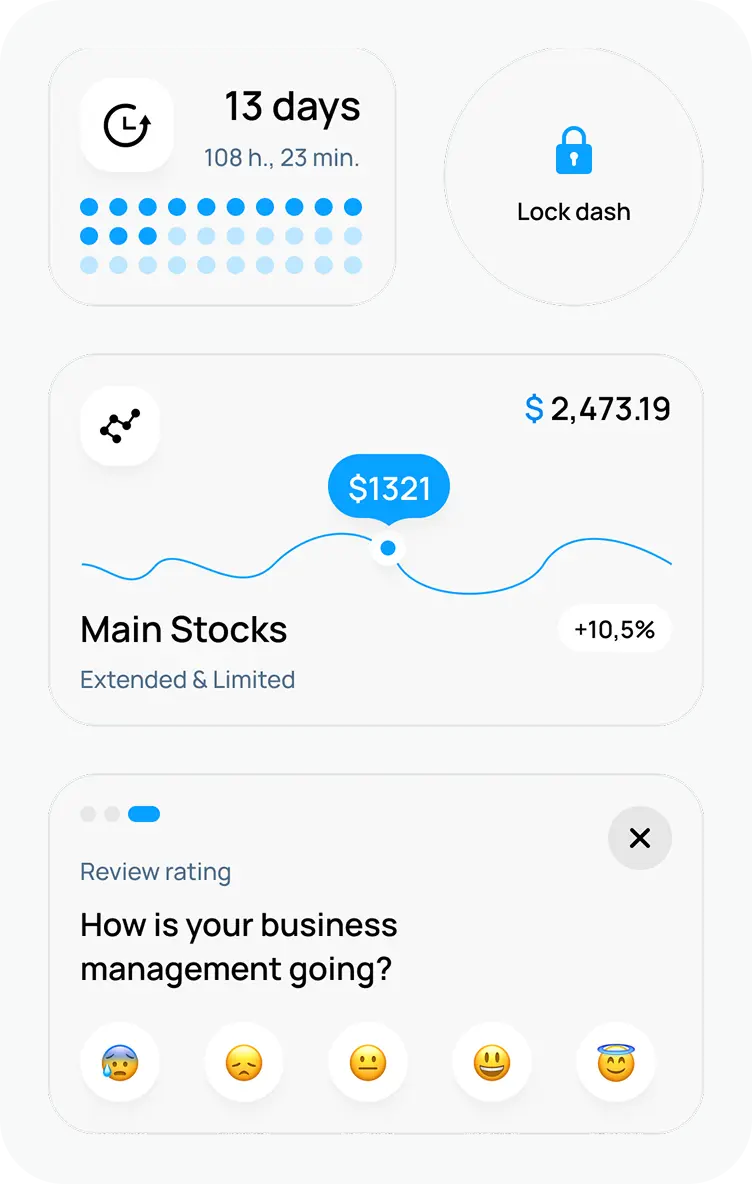
Component Development: Developers build pixel-perfect UI components from your Figma design that are fully responsive across all devices.
Implementing User Interactions: They add functionality for a smooth user experience, including clicks, form submissions, and any necessary animations.
Business Logic: The app's core features are released, so it behaves as expected according to your business requirements.
API Integration: Developers connect the app to external APIs to handle data securely and enable functions like fetching user information.
How to Prepare?
At this stage, you don't need to prepare, as your Figma design is turning into a fully functional web app, and you just get to enjoy the ride. This time is very exciting because your motivation to see the final product grows daily, and developers get to do what they do best.
It's a rewarding part of the work for both sides when the development team brings your ideas to life, and you see your hard work taking shape.
My advice is to enjoy the process, stay involved, and do not hesitate to provide feedback anytime.
Want to Convert Your Figma Design Into Web App Fast and Easy?
Stage 5: Testing

After all the coding and integration are done, you and the devs need to make sure everything works perfectly. Quality Assurance (QA) and Testing are crucial stages when the development team thoroughly tests the web app to find any issues or bugs and ensure a smooth user experience.
They also test cross-browser and cross-device compatibility, ensuring the app adapts to different screen sizes and has optimized performance to load fast and run efficiently. Accessibility is also important — your app needs to be available for everyone, including people with disabilities, following best practices for inclusive design.
How to Prepare?
Although the heavy lifting happens on the development side, your role is to test the app as a user. This means testing the overall flow, making sure the app meets your expectations, and providing feedback on anything that needs to be fixed. Your input is valuable and helps refine the product before launch.
This stage gives you the confidence that your Figma to web app conversion is polished and ready to deliver a top-notch experience to your users.
Stage 6: Deployment

After testing, it's time for the big moment: Deployment. This stage involves your app release, making it available to users. The development team sets up the hosting environment, configures security, and makes sure everything is optimized for performance. Special care is taken to smooth transitions and minimal downtime.
But deployment is not the end — it's just the beginning of the app's lifecycle. Ongoing maintenance and support are also very important to keep your web app running smoothly and securely. This includes security updates, bug fixes, and new feature rollouts as needed.
How to Prepare?
Be ready to collaborate with the development team for a successful launch. This means communicating with your marketing experts, preparing for user feedback, and planning future updates or improvements.
This final development stage ensures your product launches successfully and stays relevant and usable.
Stage 7: Gathering Feedback

Once your web app is live, the next step is to collect feedback from real users and use it to improve the product. Gathering Feedback means:
Watching how users use your app.
Tracking statistics.
Gathering feedback from stakeholders and end-users.
The development team can use this data to make iterative improvements so the app meets user needs and aligns with your business goals. The process is continuous, with regular updates and refinements to keep your app up-to-date and user-friendly.
How to Prepare?
Engage with your users by asking for feedback through surveys, user testing, or direct communication channels.
Be open to ideas and prepared to prioritize which updates or features will have the most impact.
Stage 8: Scaling and Future Planning

As your web app grows in popularity and usage, the focus moves to Scaling and Future Planning. This stage involves preparing your app for more traffic, adding new features to meet user demands, and planning for long-term success.
Future Planning also means staying ahead of the curve. The development team works with you to identify emerging trends, anticipate user needs, and map out a roadmap for future updates.
How to Prepare?
Think about your business's long-term goals, and be prepared to talk about how your app can evolve to support those goals.
Work with the development team to prioritize scalability and plan strategic feature releases that fit your vision. Stay agile and flexible, and your product will stay competitive.
This final stage ensures your app is built not just for today but for long-term success in the future.
Conclusion
The process described in this article is not standard for all web development companies, but it is how I and my company work during Figma to web app conversion.
💡 The Frontend Company loves structure in work, life, and projects. We know how important it is to estimate time, how crucial it is to hear each other, and how to build a comfortable workflow for you and us. If it fits your style, feel free to contact us, and our manager will consult you for free about your project and the best way to do it.
Figma to web app conversion is not just about the technical side, tools, and step-by-step instructions, it's about working with people.
Unlock the full potential of your product

Boost customer retention & satisfaction
Become more competitive on the market
Move to the latest technologies stacks
Improve usability & visual appeal
FAQ


Alex Vasylenko is the founder of The Frontend Company, DBC and several other successful startups. A dynamic tech entrepreneur, he began his career as a frontend developer at Deloitte and Scandinavia's largest banking company. In 2023, Alex was honored as one of 'Top 10 Emerging Entrepreneurs' by USA Today.
RATE
Rate this article please
This will help us provide more useful information.
1351 ratings, average 4.91 out of 5